- الرئيسية
- كاميرات شبكية IP
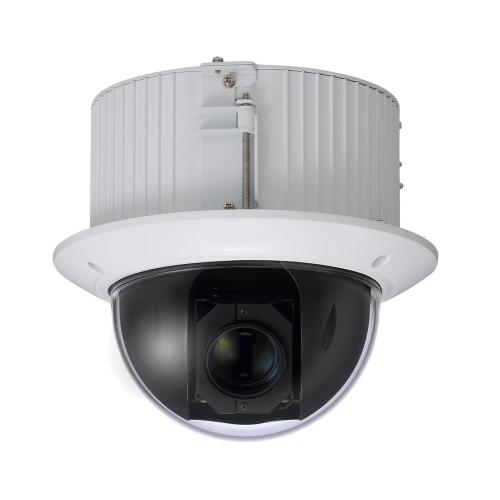
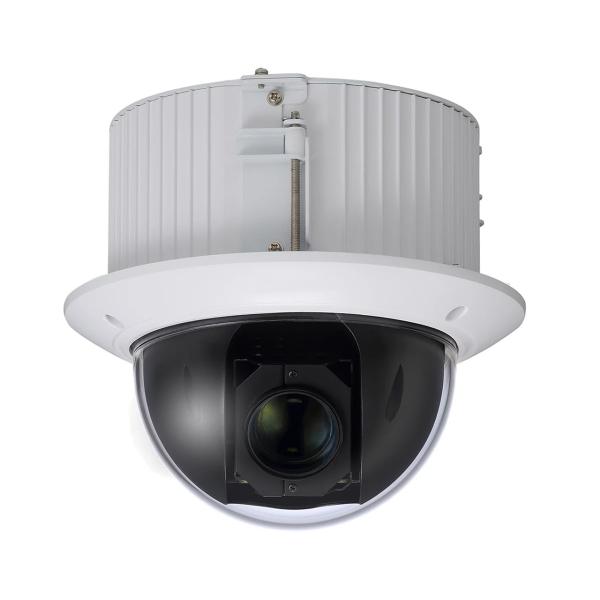
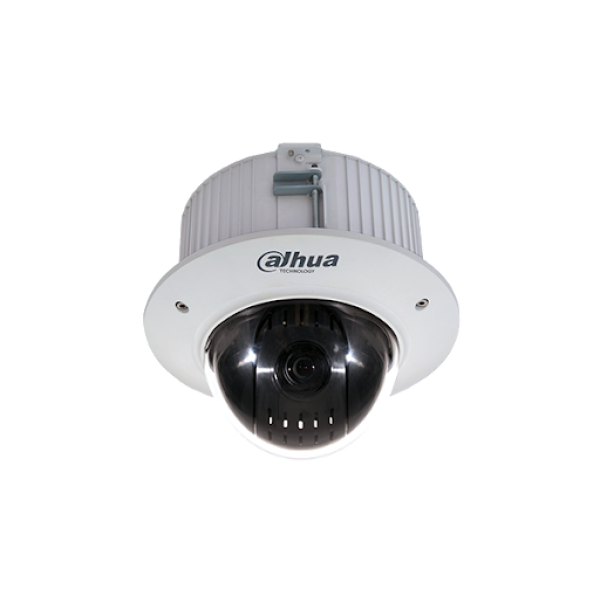
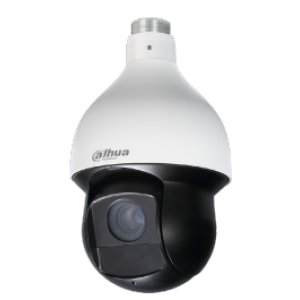
- كاميرا مراقبه من شركة داهوا IP داخليه 2 ميجا عالية الدقة زوم تكبير12 ضعف متحركة DH-SD42C212TN-HN

كاميرا مراقبه من شركة داهوا IP داخليه 2 ميجا عالية الدقة زوم تكبير12 ضعف متحركة DH-SD42C212TN-HN
830.00 SAR
شامل الضريبة
حالة التوفر : متوفر
الشركة : Dahua
الموديل : DH-SD42C212
كاميرا المراقبة داهوا داخليه 2 ميجا عالية الدقة HDCVI IR-
DH-SD42C212
كاميرا المراقبة داهوا خارجية ضد المياه 2MP 1080P DH-SD42C212
كاميرا المراقبة داهوا خارجية ضد المياه 2MP 1080P DH-SD42C212
المواصفات :
قوة العدسة2 ميجا 1/4 '' 2Megapixel CMOS
دقة عالية 30fps @ 1080P HD
سرعة عالية، لمسافات طويلة للانتقال في الوقت الحقيقي
HD و SD للتحويل
قائمة OSD، والسيطرة على كابل المحور
DWDR، يوم / ليلة، ICR، AWB، AGC، BLC، 2DNR
عدسة ثابتة اختيارية 3.6mm 2.8MM
IP67، DC12V
التفاصيل
CMOS 1 Megapixel، عدسة 2.8mm ، من المؤكد أن توفر لك أمن فعال في المنزل. توفر لك CCTV سرعة عالية، لمسافات طويلة للانتقال في الوقت الحقيقي دون أي متاعب. ويتميز أيضا بوضع الليلي، الذي يسجل اللقطات مع تعزيز الوضوح حتى في الظلام. هذه CCTV سهلة الإعداد والتركيب. وهي إضافة مثالية لمنزلك، والمكاتب، أو المبنى.
النموذج
DH-SD42C212كاميرا
صورة الاستشعار
2Megapixel CMOS
بكسل فعالة
1080(H)×720(V)
مصراع إلكتروني
1/60s~1/100,000s
معدل الإطار للفيديو
30fps@720P
التزامن
Internal
إضاءة مصغرة
0.05Lux/F2.0, 0Lux IR on
إخراج الفيديو
1-channel BNC HDCVI high definition video output
ميزات الكاميرا
طول المصابيح الحمراء
ليل/نهار
Auto(ICR) / Color / B/W
تقليل الضوضاء
2D
العدسة
البعد البؤري
3.6mm fixed lens (2.8mm optional)
زاوية الرؤية
H: 58.5?(80.5?)
نوع الجبل
M12
بصفة عامة
مزود الطاقة
DC12V±25%
استهلاك الطاقة
Max 3.5W
بيئة العمل
-30°C~ 60°C / Less than 95% RH (no condensation)
بعد الإنتقال
Over 800m via 75-3 coaxial cable
حماية الدخول
IP67
الأبعاد
?70mm×154mm
الوزن
المادة
Metal
صنع في الصين
الضمان لمدة سنة كاملة
المواصفات:
1 / 2.8 "2Megapixel CMOS
HDCVI
25 / 30fps تجهيز @ 1080P (1920 × 1080)
60FPS @ 720P
DWDR
تسجيل ليلي DNR (2D& 3D)
Snelheid 300 درجة / ثانية Pan0-360 °
OPTISCHE 5.1 ~ 61.20 مم التكبير
عدسة الآلية
الصوت 1CH في
2 في / 1 من
IP66
>Powerful 12x optical zoom
>Support dual-streams encoding
>Max. 25/30fps@1080P (1920x1080)& 50/60fps@720P resolution
>DWDR, Day/Night (ICR), DNR (2D&3D), Auto iris, Auto focus, AWB, AGC, BLC
>Max 300°/s pan speed, 360° continuous pan rotation
>Up to 80 presets, 5 auto scan, 8 tour, 5 pattern
>Built-in 2/1 alarm in/out
>Support intelligent 3D positioning with DH-SD protocol
>IP66, POE
1080P PTZ cameras can be expensive and sometimes cost thousands. They also may require special power supplies and can be large. The Dahua SD42212SN-HN has 12x optical zoom, pans and tilts quickly, can work with the included power supply or you can use a PoE injector, is smaller in size than other Dahua PTZ cameras and comes with a street>Support dual-streams encoding
>Max. 25/30fps@1080P (1920x1080)& 50/60fps@720P resolution
>DWDR, Day/Night (ICR), DNR (2D&3D), Auto iris, Auto focus, AWB, AGC, BLC
>Max 300°/s pan speed, 360° continuous pan rotation
>Up to 80 presets, 5 auto scan, 8 tour, 5 pattern
>Built-in 2/1 alarm in/out
>Support intelligent 3D positioning with DH-SD protocol
>IP66, POE
Main Features
- 5.1 mm~61.2mm lens (12x Optical zoom)
- H.264&MJPEG dual-stream encoding
- 30fps@1080P& 60fps@720P resolution
- DWDR, Day/Night (IR Cut Filter), Ultra DNR, Auto iris, Auto focus
- Max 300°/s pan speed, 360° endless pan rotation
- Up to 80 presets, 5 auto scans, 8 tours, 5 patterns
- Alarm inputs (2), output (1)
- Audio input/output
- Intelligent 3D positioning
- Micro SD card slot (card not included)
- IP66 Ingres Protection
- IK10 Vandal Resistant
- -20ºC ~ 60ºC temperature range (-40ºC ~ 60ºC with heater on)
This camera permanently found a home att our weekend lake home where I used the optional cap and arm to mount it to the fascia board. You can mount the camera directly to an eave as long as it’s level to the ground. For testing by my garage, I mounted straight to the eave of the roof.
Dahua has become a PTZ leader in the industry with a large assortment of 1080P PTZ cameras. While this represents their affordable Eco-savvy Series, it’s far from a being a low end camera. The sensor and lens combine to give this camera very good low light performance. For example, I replaced a Hikvision mini bullet, even with IR LEDs on the bullet, the Dahua SD42212SN-HN has much better low light capability as you’ll see.
The closest comparison is the ACTi B95 I reviewed a year ago. The image quality, low light performance and resolution are comparable. What’s different is the size, the B95 is much smaller, same size as the Hikvision dome in pictured above. The ACTi B95 uses less power and standard PoE (the Dahua requires PoE ) and the B95 was more responsive. A nod goes to Dahua for having 12x optical zoom vs. 10x optical zoom on the ACTi. But the ACTi is about $400 more expensive.
This is what the web interface looks like when you first log in. There’s the PTZ arrows buttons to pan and tilt the lens. The button in the center turns on 3d positioning. When this is yellow, you can click on the screen to move the lens around and draw a box with your mouse to zoom in. There’s buttons for zoom, foxus and iris. Also a drop down where you can select a preset or a tour of presets. There’s also options to take a snapshot, manually record, chose a stream.
To configure the camera, click on the Setup tab across the top. Under the camera menu are two items, Conditions and Video. Conditions is where you control image properties like brightness, contrast and such. Also
this is where you set wide dynamic range (WDR) or backlight compensation (BLC) options as well as noise reduction.
The Picture sub-menu is where you can set the brightness, contrast, sharpness and such.
Under the Video menu, you can set the resolution, a max of 1080P for the main stream and max of D1 (704×480) for the sub stream. The sub stream comes in handy when live viewing the camera from your phone.
Also under the Video menu, under the Overlay tab, you can set what and where overlay text is displayed. In my case, I displayed time and the channel title.
Under the Network -> TCP/IP menu item, you can set the IP address if you have not already done so with the Config Tool that’s included on the CD. Use that tool to find the camera initially (192.168.1.108 with a user/password of admin/admin are the defaults).
The next sub-menu item down is Connection and that’s where you can change the ports if you need to. To use the camera remotely, you’ll need to port forward the HTTP, TCP and RTSP ports.
The PTZ menu item is next. I left the protocol at default, didn’t see a need to change it. The Function menu is where you set presets, tours and such. In this case, I set 4 presets. You click “add” to add a new preset, aim the lens where you want and then click the “save” button. To go to a preset, click on Live on the top menu bar, then select Presets under PTZ Function on the right and select the preset number you created and click “Go to”.
A “Tour” is a series of presets that you want to have repeat continuously. You click “ Add”, give it a name, then add the presets you created above. To start the tour, click on Live on the top menu bar, then select Tours under PTZ Function on the right and select the tour number you created and click “Go to”.
You’ll need to set the time and time zone. I enabled the defaults NTP server and Daylight Savings Time and set the Time Zone for my area. Then click “Save” to save these settings.
Under the Playback tab on top, you can play back video recorded on an SD card if you installed one. It supports up to a 64GB microSD card. I would recommend a good heavy duty SD card like the Sandisk High Endurance made for surveillance cameras. The problem with SD cards is they have a limited amount of writes that can be done before the card goes bad. Sandisk claims to make one that has better write endurance. The larger the SD card you get, the less writes per sector are done, so you can double the life of the card by getting one that’s twice the capacity. .
Images
Now onto the images. I mounted the camera under the eave of my garage. Also mounted it at our lake home. As before, you can click on the image to see the full size 1080P image straight from the camera.
This image is taken at full wide angle and WDR turned off.

I set WDR to 10, a fairly low setting, but you can see more detail in the trash truck at the expense of less contrast in the image.

At night, with the camera in night mode, the image quality is pretty decent considering it’s using existing light.

With the camera left in color/day mode, the image is a little darker, but you get some sense of color. I would let it go to night mode in B&W.

Looking down the street, zoomed in more, no WDR, the image is quite good

Again, in color mode, a little darker, but you get a sense of colors like the red stop sign.

Now the prettier stuff, the camera mounted at the lake. This is with the zoom set to the widest angle. WDR turned off, and most importantly, because I want to have this viewed by several people, I set the bit rate real low at 2,048. Normally I set this to 6,144. The picture looks very good at the low bit rate where other brands like Hikvision tend to deteriorate if you set it this low. Bit rate is how you set how much compression you want based on how much bandwidth it should use.

I then zoomed in about half way, maybe 6x and panned to the left.

Then I zoomed in all the way to the homes across the lake. You do get some chromatic aberrations at full zoom but still pretty good.

I took this image at dusk as a screen snapshot off VLC player.

This is the image at night. Pretty good considering when you look out the window you see all blackness with some spots of light across the lake. The Hivksion ds-2cd2032-i that this replaces just showed a black screen with a few white dots.

Under the Network -> TCP/IP menu item, you can set the IP address if you have not already done so with the Config Tool that’s included on the CD. Use that tool to find the camera initially (192.168.1.108 with a user/password of admin/admin are the defaults).
The next sub-menu item down is Connection and that’s where you can change the ports if you need to. To use the camera remotely, you’ll need to port forward the HTTP, TCP and RTSP ports.
The PTZ menu item is next. I left the protocol at default, didn’t see a need to change it. The Function menu is where you set presets, tours and such. In this case, I set 4 presets. You click “add” to add a new preset, aim the lens where you want and then click the “save” button. To go to a preset, click on Live on the top menu bar, then select Presets under PTZ Function on the right and select the preset number you created and click “Go to”.
A “Tour” is a series of presets that you want to have repeat continuously. You click “ Add”, give it a name, then add the presets you created above. To start the tour, click on Live on the top menu bar, then select Tours under PTZ Function on the right and select the tour number you created and click “Go to”.
You’ll need to set the time and time zone. I enabled the defaults NTP server and Daylight Savings Time and set the Time Zone for my area. Then click “Save” to save these settings.
Under the Playback tab on top, you can play back video recorded on an SD card if you installed one. It supports up to a 64GB microSD card. I would recommend a good heavy duty SD card like the Sandisk High Endurance made for surveillance cameras. The problem with SD cards is they have a limited amount of writes that can be done before the card goes bad. Sandisk claims to make one that has better write endurance. The larger the SD card you get, the less writes per sector are done, so you can double the life of the card by getting one that’s twice the capacity. .
Images
Now onto the images. I mounted the camera under the eave of my garage. Also mounted it at our lake home. As before, you can click on the image to see the full size 1080P image straight from the camera.
This image is taken at full wide angle and WDR turned off.

I set WDR to 10, a fairly low setting, but you can see more detail in the trash truck at the expense of less contrast in the image.

At night, with the camera in night mode, the image quality is pretty decent considering it’s using existing light.

With the camera left in color/day mode, the image is a little darker, but you get some sense of color. I would let it go to night mode in B&W.

Looking down the street, zoomed in more, no WDR, the image is quite good

Again, in color mode, a little darker, but you get a sense of colors like the red stop sign.

Now the prettier stuff, the camera mounted at the lake. This is with the zoom set to the widest angle. WDR turned off, and most importantly, because I want to have this viewed by several people, I set the bit rate real low at 2,048. Normally I set this to 6,144. The picture looks very good at the low bit rate where other brands like Hikvision tend to deteriorate if you set it this low. Bit rate is how you set how much compression you want based on how much bandwidth it should use.

I then zoomed in about half way, maybe 6x and panned to the left.

Then I zoomed in all the way to the homes across the lake. You do get some chromatic aberrations at full zoom but still pretty good.

I took this image at dusk as a screen snapshot off VLC player.

This is the image at night. Pretty good considering when you look out the window you see all blackness with some spots of light across the lake. The Hivksion ds-2cd2032-i that this replaces just showed a black screen with a few white dots.

| كاميرات المراقبة و اكسسواراتها | |
|---|---|
| استخدام الكاميرا | داخلي |
| الدقة | 2 ميجا بكسل |






-300x300.jpg)
2_thumb-300x300.png)

-300x300.png)

-300x300.jpg)
